Simple Fixes for Common Google Play Store Problems 19 April 2020
Simple Fixes for Common Google Play
Store Problems
When the Google Play Store crashes, it sometimes gives you an
error code. While searching the internet for each code helps, oftentimes it’s
not necessary. Most Play Store problems require one of five basic fixes.

The Basics of Fixing
Google Play Store
There are five different fixes for repairing most Play Store
errors. You don’t need to use all of these; try the first one and see if it
fixes the problem. If it doesn’t, move to the next.
(1) Stop the app and
then wipe the Store’s cache and/or data.
( 2) Switch from a data
connection to Wi-Fi.
( 3) Uninstall updates
to the Play Store and update it again.
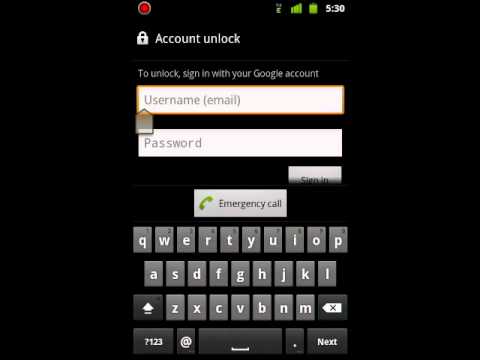
(4) Refresh your Google
account.
(5) Register your
device with Google.
Walking through these steps will resolve the majority of Play
Store problems. However, we will cover some common error codes that these
methods won’t fix later.
Why Modifying Android
Causes Google Play Store Failures
This discussion does not cover rooted devices or those running a
custom ROM. These processes change Android’s system files and thus introduce
too many variables to diagnose. These changes can stop the Play Store from
functioning.
That’s a big reason why installing custom ROMs or restoring from
a backup using a custom recovery sometimes prevents the Store from working. We
advise using Titanium Backup, or a similar backup
solution, to restore apps with data.
Don’t get me wrong; there are a lot of reasons to install a
custom ROM. Unfortunately, when something goes wrong (as it often does),
troubleshooting requires greater experience and effort than on an unmodified
device.
1 Stop App, Wipe Cache and Data
The
Google Play Store relies on other processes that run silently in the
background. Whenever you wipe the Play Store, it’s also a good idea to do the
same with Google Play services and Google Services Framework—we’ve looked
at updating Google Play
services if you want to try that first.
How to Update Google Play Services on
Android
Want to learn
how to update Google Play services? If Play Services doesn’t update, you
probably can’t use many of your favorite apps. This means your phone is near
useless, so you’ll want to run a Google Play services update as soon as
possible.Let’s look at what Google Play services is, how to update it properly, and why you can’t update it sometimes.
How to Update Google Play Services
Most of the time, Google Play services should update on its own
without issue. You’ll only need to look into a Google Play services app update
if something get stuck.
Here’s how to install the latest version of Google Play services
on your device manually.
Step 1 Check Your Internet Connection
A flaky internet connection is the number one cause for Play
Services not updating. Make sure you’re connected to a stable Wi-Fi network
when you try to update.
If you’re still having problems, restart your device to clear up
any temporary issues. Failing that, you should reboot your router.
Step 2 Wipe Google Services
Cache
Wiping Google Play services’ temporary file storage location, or
cache, is the best way to resolve update issues. To do this, perform the
following steps (which may vary slightly depending on your version of Android
and device).
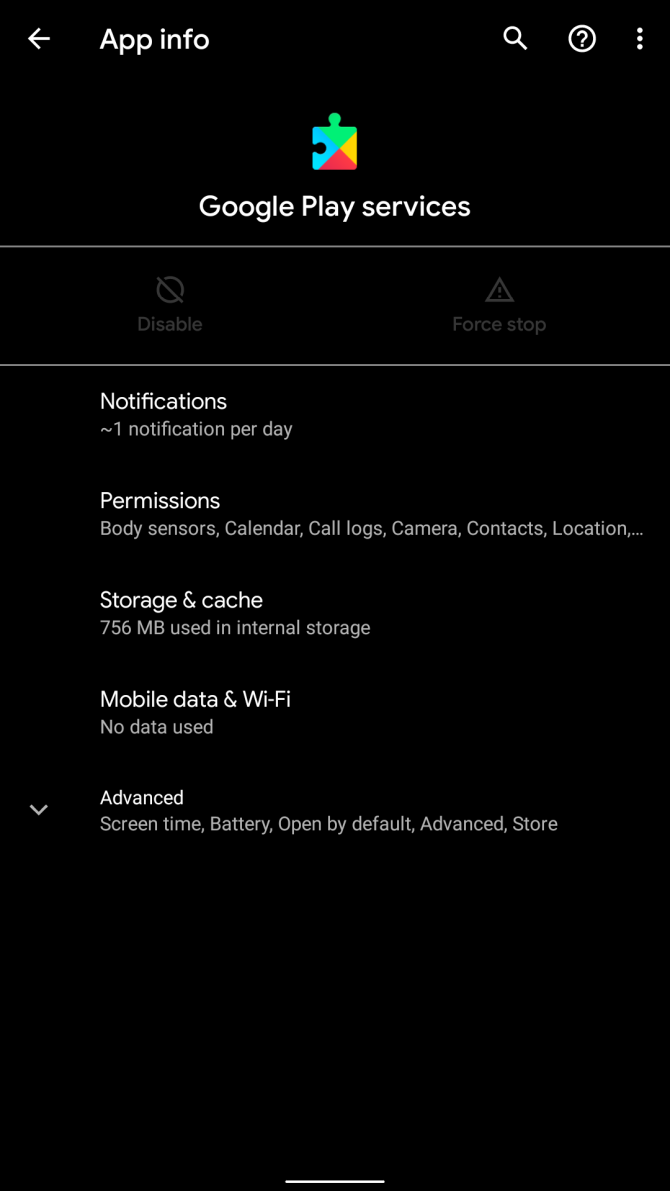
First, go to Settings > Apps & notifications.
Next, tap See all X apps
From the list, find and tap on Google Play services.
Then choose Storage & cache from the list of options on
its app page. Finally, hit Clear cache on the resulting menu.
Once
you’ve done this, restart your device. If it doesn’t help, repeat the above
steps but select Clear
storage instead.
 |
| Add caption |
3. Force an Update of Play Services
After restarting, you should try to force an update of Play
Services. You shouldn’t need to do this in most cases, but it’s worth a try if
you continue to experience issues.
To do this, visit the Google Play services entry in Settings as
mentioned above. Expand the Advanced section and tap App
details to open its page on the Play Store. If you’re on your phone,
you can open the Google Play services Play Store page to
jump right to it. The green button will show Deactivate if
you’re up-to-date and Update if you can install a new version.
You also can do this by visiting Play Store in a web browser and
signing in with your Google account. Open the above link to the Google Play
services page on Google Play, and check for an update there.
When You Can’t Update
Google Play Services
If you fall into one of these categories, your phone probably won’t
be able to update Google Play services using the method outlined above.
Android 4.0 and Below
Can’t Update Google Play Services

As of 2018, Google no longer supports Android 4.0 Ice Cream
Sandwich or below. That means if you own an Android device running one of those
version, you can’t install or update Google Play services. These users can
either install
a custom ROM or try sideloading Google Play Store alternative as
mentioned earlier.
if your phone runs low on space and does not support a microSD
card, your only option is to delete files. But how do you find space-wasting
clutter?
One of the easiest options is to use Files by Google. It
automatically finds common space wasters, like large media files, and removes
them when you direct it to. On the downside, it gives Google complete access to
the contents of your phone.
Advanced users can instead give DiskUsage a try. It’s free and
open source, though it hasn’t seen an update since late 2017.
3. Google Play Store Not Downloading Apps
Sometimes
Google Play won’t install applications. You have two major options to fix this.
The first is to wipe Google Play’s cache, as demonstrated in #1 above. The
second is to erase Google Play’s history.
This method isn’t a sure fix, but it’s worth a try if clearing
cache didn’t work. Here’s what to do:
1.
Launch the Google Play Store.
2.
Open the left sidebar and go to Settings.
3.
Choose Clear local search history.
4. How to Reinstall the
Google Play Store
You can’t uninstall the Google Play Store without rooting
your device. If you think you’ve deleted Google Play, chances are that
you’ve actually disabled it instead. To re-enable the Play Store:
1.
Visit Settings > Apps & notifications and
choose See all apps.
2.
At the top of the list, tap the All apps dropdown
and change it to Disabled apps.
3.
Find Google Play Store and tap on it. Tap on
the Enable icon to activate it again.
How Do I Install Google Play?
Some imported
tablets and smartphones don’t come with the Google Play Store installed. In
this case, you’ll need to locate a Play Store APK file from a third-party
source and then manually install it.To do this you’ll first need to follow our guide to sideloading apps on Android. Once you’re set up, grab the Play Store APK from APKMirror and sideload it.
Download: Google Play Store (Free)
5. How Do I Free Up Memory on the Android Device?
In Android (like most operating systems), “memory” refers to RAM, not storage. The Android OS works best with a minimal number of installed applications. That’s because some apps like to run in the background, even when you aren’t using them
The more apps you have installed, the more likely some will run hidden from view, all the while consuming resources and battery life. The simplest solution is to uninstall all non-essential applications.
We
don’t recommend using task killers, as they negatively impact the functionality
of your device. On top of that, they don’t adequately address the main issue:
apps which consume resources can also start themselves at will. See how to manage memory on
Android for more tips.
8. System UI Not
Working (Android 9 or Older)
1.
Launch Settings
> Apps & notifications and select See all X
apps.
2.
Make sure the top dropdown list
says All apps, then scroll down to System UI.
3.
Select Storage
& cache, then choose to Clear
cache.
4.
Restart your device.
On Android 10
and newer, you don’t have access to the System UI service. However, you can attempt
to modify the System UI using an app called System UI Tuner. Unfortunately,
this app can only change the appearance of some of Android’s user interfaces,
such as the status bar. Even so, it’s better than nothing.Download: System UI Tuner (Free)
9. Android
Download Manager Not Working
Sometimes the Android Download Manager doesn’t work. Oftentimes,
the files it’s downloading (to a temporary location called a “cache”) become
corrupted.
In this case, wiping the cache should fix the problem. However,
this doesn’t work in Android 10 or newer. To wipe the cache on older Android
versions:
1.
Launch Settings > Apps & notifications and
tap See all X apps.
2.
Make sure the top dropdown list says All apps, then
find and tap System UI in the list.
3.
Select Storage & cache, then Clear cache.
4.
Restart your phone.
If that doesn’t work, or you have Android 10 or newer, consider
using a third-party download manager like Advanced Download Manager.


टिप्पणियाँ
एक टिप्पणी भेजें